Perhaps the Simplest Measuring Instrument After the Calibrated Stick.
Pressure. It’s one of those things. You know, the sort of thing you never, ever think too much about. Until one day you run into a problem where it would be really handy to know about it.
Obviously pressure gauges exist, and are relatively easy to get your hands on. However, they aren’t cheap- particularly at the lower end of the scale. Electronic pressure sensors are expensive; requiring circuitry and power to use. Tough to justify grabbing one just to have it ready to go.
There does exist a type of pressure gauge so easy to build, it doesn’t make sense not to have one ready to go: the U-tube manometer. It requires no power, no special parts, and can be built from stuff you probably already have. Win, win, win.
After having to improvise a manometer one too many times, I finally decided to just buckle down and build a permanent one. It was so quick and easy, I just can’t explain why I didn’t do it sooner.
Manometer Theory
Manometers typically consist of U-shaped tubes half-filled with liquid. Mercury was (and still sometimes is) used for it’s high density and low vapor pressure. Water or oil is preferred for general use. Both are less liable to poison you; always a plus.

Steady state: P1 = P2, h1 = h2

P1 > P2, h1 < h2
Δh is directly proportional to applied pressure
In the steady state (i.e. no applied pressure) it should be obvious that the liquid will be at the same height in both legs. Liquid mass in one tube is exactly balanced by the other. Pressure on each leg is likewise identical, having no net effect.
If more pressure is applied to one leg, it will displace liquid into the other column. The exact relationship is described by the following equation:
ΔP = (h1*P1 – h2*P2)*ρ
Where h is the height of the liquid, P is the applied pressure, and ρ is the density of the fluid.
This equation is valid under three assumptions:
- Both legs are vertical.
- Both legs have the same cross sectional area.
- Both legs have the same density liquid.
A more general equation exists that takes these factors into account. In practice it’s not all that useful. Simple U-tube manometers are the most common type. They’ll work for the vast majority of cases, so there’s no sense in over-complicating things.
Typically the pressure is directly stated as “inches of water”, or “millimeters of mercury”, or whatever combination of units and fluid describes a particular manometer. Conversion factors to other units of measurement (e.g. PSI, Torr, atmosphere, Pascal, etc) are readily available.
Building a U-Tube Manometer
Improvising a manometer from commonly available materials is trivial. All you need is clear tubing, water, and some place to hang it. I have done this many times. It is, shall we say, inconvenient.
Getting stuff together is not the problem. I have two issues I always run into: Strapping the tube down, and connecting it to whatever needs measuring. It’s always messy ad-hoc stuff. More than once I’ve had tubes slip out of my attempts to hold them down- usually taking whatever was attached to them along for the ride.
The solution to this problem is obviously a stand of some sort. Preferably one with detachable connectors. It only took about an hour to design and build one, including various tweaks and modifications.
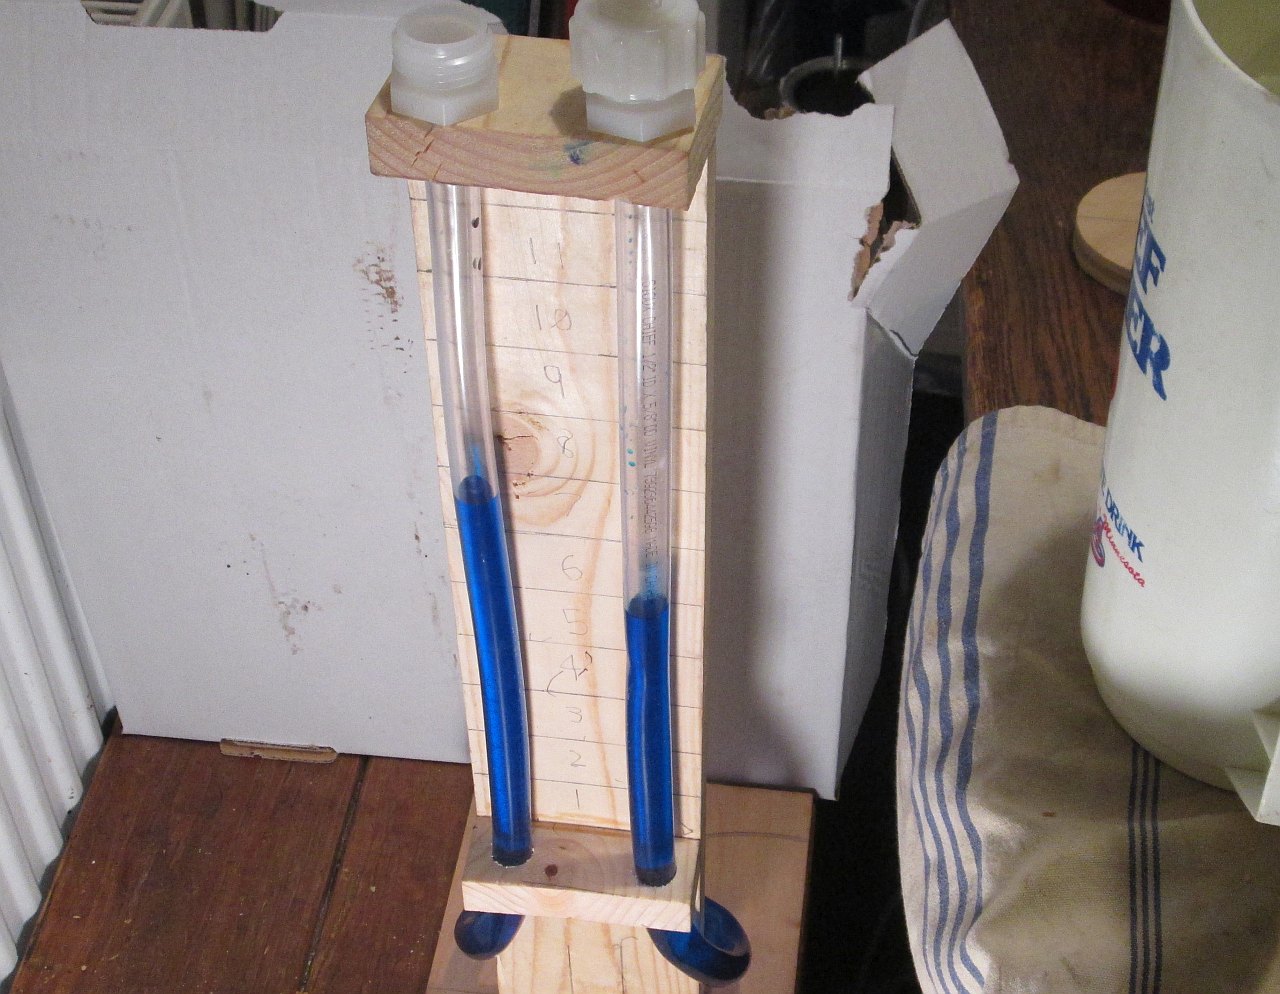
I could give detailed steps for how to build this thing, but I don’t really have to. There are no real tricks or traps. What you see, is exactly what you get:

Front, showing the mounting blocks.

Rear showing the U-bend, also a couple of kinks.
Just a few chunks of scrap wood banged together. The top block has two holes drilled to pass the tube plus the connector. These are loose because I don’t have the exact drill size. The lower block is drilled to the outer diameter of the tube. It makes a friction fit to keep everything together. I grabbed a random chunk of plywood for the base. Big enough not to tip over from casual contact. Small enough not to be a bother.
For the tube itself, I used some 5/8″x1/2″ PVC tube. Note that unlike pipe this is an actual measurement of the tube diameter. Material isn’t that important. Pick something that’s easy to bend and easy to see through.
Without a scale, the manometer is kind of worthless. I chose inches because I just happen to have a square with an inch-thick blade on it.

Today I present to you “A Visual Example of Cumulative Errors”.
Why didn’t I just mark inches directly off my ruler? Laziness. Sometimes it does come back to spite you.
Not my best work, but it’ll do. I can always slip a ruler or some other measuring scale behind the tubes later on.
Those fittings deserve a closer look. Standard tube connectors are barb type. I know from a lot of experience that they do not come apart without a fight. I spent a long time looking for a better option.
Eventually I ran across garden hose to hose barb fittings. They’re available wherever tube fittings are sold. Just make sure the barb matches the tube you use.

It took too long to find them, but I’ll never forget them.
One advantage of these fittings is that you can hook a garden hose to them. Or a washing machine hose. Or a surprisingly large amount of valves, adapters, and other fittings. The more I think about it, the more I realize using garden hose fittings is a really good idea.
Other connectors exist, but I doubt anything is going to beat the garden hose connector.
Using the U-Tube Manometer
Actually using the U-tube manometer is dead easy.
First you have to fill the tubes about halfway with water. Filling doesn’t have to be exact, halfway just maximizes the useful range. Feel free to add some food coloring to make the water more visible. Do this before filling the tubes. I’d also recommend a funnel- the type that lets air out while you pour. Otherwise you have to gently run the water down the side of the tube, like pouring a carbonated drink.
Then connect the tubes to the pressure sources. For gauge pressure one tube is left open to the atmosphere. Differential pressure connects both tubes to different sources (e.g. pitot-static measurements). Either way, the columns will move to show the difference in pressure.
Quantitative values are taken by reading the scale. Some manometers have a “mirrored” scale that puts zero in the middle. This has the advantage of only requiring one reading. I find it easier to just put zero at the bottom, count up, and subtract the two values. Putting zero at the bottom also means you don’t have to fill it exactly to the zero line.

One of my primary uses of a manometer is to measure the performance of small fans. Here I’m measuring the suction pressure of one of those little square fans used to cool electronics.
For this particular example, the difference is tiny. Axial fans won’t pull more than about 0.25 inches of water. I got about 0.1 inch, likely due to poor sealing. By comparison, the blower I use for foundry work pulls 2 or 3 inches even with poor sealing.
Keep two things in mind when using the U-tube manometer:
If you exceed the maximum pressure, water will spray out the other end followed by whatever high pressure fluid was pushing it. So don’t do that.
Water is heavy, so it will take some time for things to settle. Fast pressure changes might get damped out. Whether that’s a good thing or not depends on the intended application.
Finishing Up
U-tube manometers hit that sweet spot where ease of construction, usefulness, and cost effectiveness overlap. Making this tool cost less than 20USD, with enough materials left over to make three or four more. No need for fancy electronics either; opening up all sorts of low-tech applications.
There’s a lot of applications for this simple tool. Just to name a few: measuring airspeed, sensing depth, measuring expansion, calculating flow rate, checking a closed system for leaks, monitoring chemical processes, measuring the performance of pumps, etc. If it can be measured by one or two pressures, it can be measured using a U-tube manometer.
You can make a U-tube as long as you’d like. In practical terms, I would say 3ft/1m is the limit. Not because of any fundamental limit, it’s just the maximum height that’s easy to handle. Any bigger and you’ll be better off using a proper pressure gauge. I’d like to build one at least 24″ tall for some of the more powerful blowers I want to test.
Were I to build this again from scratch, I would downsize the tube to 1/2″x3/8″. The 5/8″x1/2″ tubing was a little too big to get the tight bends I wanted. You can see the kinks in the rear photo. They aren’t enough to stop it from working, but they’re ugly and a potential point of failure.
Long term use makes evaporation a concern. Put a drop of oil in each leg to make the water last longer. Freezing is also a concern, though a little antifreeze will fix things up. Just make sure it won’t contaminate the system the manometer is attached to.
Like I said, pressure is something you rarely think about until you really need to. Well, it turns out I need to think about it more often than I once thought. I have three or four projects in mind where I’d use a manometer. Now I can just grab this manometer off the shelf and hook it up. When I’m done, just unscrew some fittings and put it back. So easy.
I wish I built this sooner, but late is better than never. Now, if you’ll excuse me, I have three or four long-term projects to work on.
Have a question? Comment? Insight? Post below!