A DIY Version of Professional Tripod Arms
I never knew just how hard it is to get consistently good pictures. Now that I’m doing this blogging thing semi-regularly, I’ve gotten plenty of experience in how not to photograph things.
Let’s just say if you see a few pics here that aren’t great, the ones you don’t see are much, much worse. Editing can only fix so much.
Lighting is by far the most important part of photography, and I’ve gotten pretty good at mixing multiple light sources together. Positioning the camera, particularly one that can’t focus, has proven to be a much harder problem.
Most of the stuff I do requires an overhead camera angle. I have a decent tripod, but no way to extend the camera over the subject. There exist horizontal tripod arms that let you do just that, as well as provide some extra positioning flexibility. Tripods are pretty bulky after all.
Buying one of these arm thingies is pretty easy. But is it worth it? I only want good overhead shots, not a complete free-form positioning mechanism. The arm itself is mechanically very simple. Surely building one isn’t that hard?
No, it isn’t hard at all! In fact it’s a good introduction to Quick Projects, something I’ve been wanting to do for a while now. Quick Projects are fast, simple projects that don’t require a detailed write-up, but I still think are worth publishing. It’ll take longer to read this than it will to make the arm.
Tripod Arm Construction
I only have a few design requirements:
- Offset the camera position horizontally
- Use materials I already have to hand
- Uses the standard 1/4-20 mounting thread
That’s it.
Arm Body
I chose to use 3/4″ stock to make the tripod arm. I just happen to have a fairly large plank in the scrap pile, about 2.25″ across. Cut it down to an appropriate length and drill three holes.

Two feet is about right. Long enough to stretch over a table, short enough to stay out of the way.

Tripods typically have a very short 1/4-20 mounting stud. Bolting-through is usually not possible.

I chose the simplest way out, and just tapped a 1/4-20 hole directly into the wood.
Tapping a thread into wood is totally feasible, but it will wear out quickly. To make it last longer wipe a little wood glue inside the threaded hole. Tap the threads again once the glue dries. You’d be surprised how sturdy this ends up. A similar trick can reinforce worn-out screw holes.
Camera Mount
I just cut a square section off of the same stock, and drilled through the center. I chose to tap this hole with 1/4-20 threads too. Wood screws hold it to the arm. Pilot holes are needed because the screws are so close to the edge.

Tripods typically use a two part mounting system. The small knob is used to thread the stud into the camera. The big knob is then used to hold the camera in place.

Replicating this mounting system is pretty easy. Note that the hole the bolt passes through is 1/4-20 threaded.
The mounting bolt is designed so that securing the camera and positioning it are separate actions. I’d add a proper grip to the carriage bolt, but why bother for such a simple project?
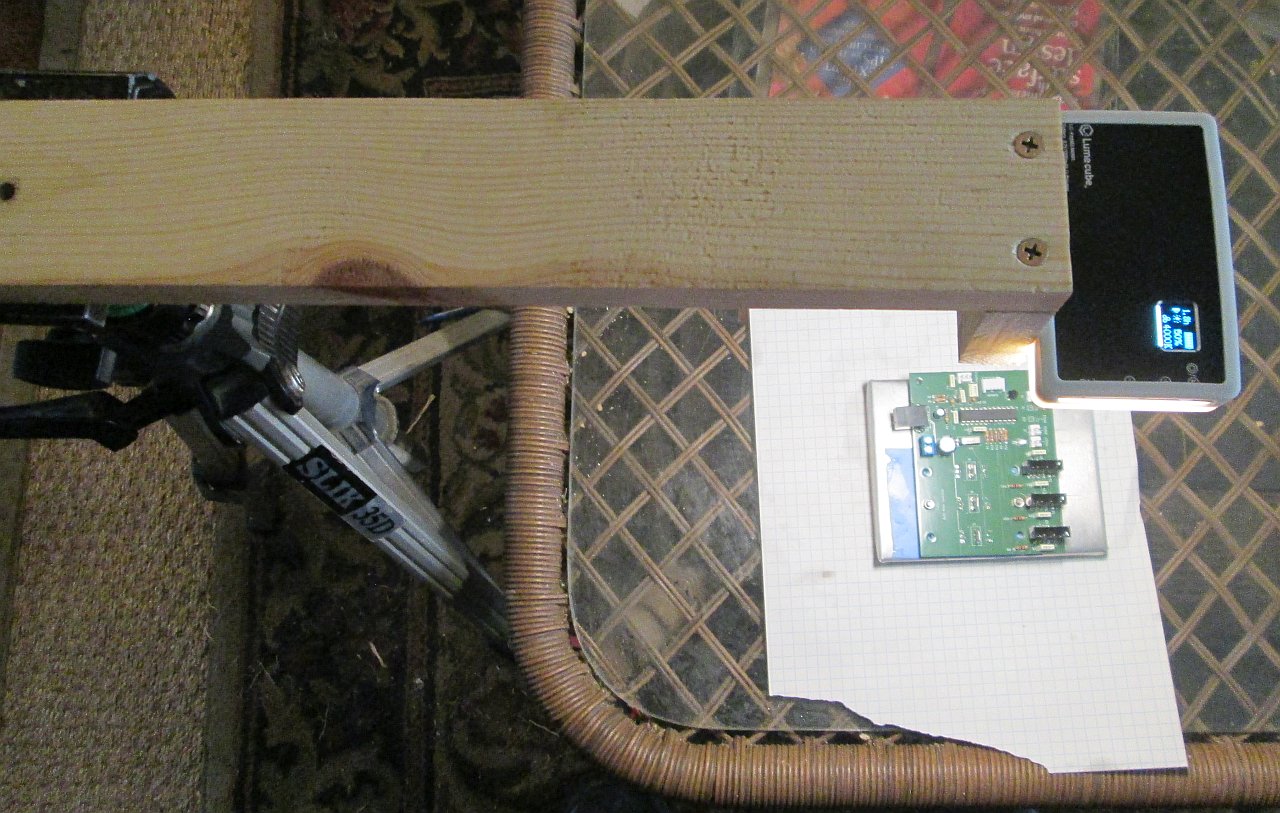
Finished Tripod Arm

Finished arm shown using my light instead of my camera. Because it’s hard to make a camera take a picture of itself.
No I don’t have an appropriate mirror; thank you for your insight.
Well, it does everything I want it to with no extra fluff. That’s what I call a success.
Cost-wise I estimate a total DIY budget of about 10USD- if you buy everything new. Buying one will cost around 30USD, minimum. Definitely cost effective.
Time-wise I spent about ten minutes, not including watching glue dry. Close enough to instant. The whole project was done and ready to use same day.
Finishing Up
Short, simple, and sweet. If only every project ended up that way. I’m already using this arm for photographing upcoming projects.
I chose to tap the mounting holes directly into the wood. An alternative would be to press a 1/4-20 nut into an undersized hole. That has limits too; namely keeping the nut from falling out. The proper way to do this is a 1/4-20 threaded insert. Personally I find threaded inserts pretty clumsy. If I strip out the mounting hole I might “upgrade” to one.
Wood was used because that’s what I had to hand. Other materials can easily be used. I have some 3/4″ aluminum square tubing that would make a pretty good arm. If I need a more advanced version, I’ll consider using that tube.
Simplifying the arm was more important than tacking on questionable “features”. I have a few ideas for how this could be expanded, but outside of drilling a couple of extra mounting holes I don’t see any immediate need.
I tend towards large, complex projects that require lots of time to complete. With Quick Projects I’m going to try my hand at shorter, simpler projects that fit in between the big ones. Small projects ought to work better with my somewhat chaotic schedule too.
You may recognize that circuit under the light. This project was a response to how hard it is to get good pictures of small electronics parts without an overhead angle. Next time I’ll be showing how I fixed the egregious mistake I made, complete with nice close-ups of the rewiring.

Have a question? Comment? Insight? Post below!